How to Deploy a Temporal Service using an SQLite Backend with Nginx
Introduction
There are many ways of deploying a Temporal Service. For a large-scale deployment, you can use Docker or Kubernetes to configure multiple pods with the ability to scale horizontally. For local development, you can use the server subcommand of the Temporal CLI client to run a single-user server.
If you need a deployment that fits in between these options -- for example, if you need to scale for multiple users, with fine-grained control over your deployment parameters, but without the overhead of Kubernetes -- you can deploy a Temporal Service using the official server binaries.
In this tutorial, you'll configure and deploy the two binaries needed for a complete Temporal Service (the core server and the UI server). You'll create systemd unit files to gracefully run and restart the Temporal Service automatically upon server startup, and you'll deploy an Nginx reverse proxy to handle web traffic ingress. This will give you everything you need to run a production Temporal Service, and evaluate how to scale further or migrate to Temporal Cloud. Let's get started.
Prerequisites
- A Linux server with SSH access and the Nginx web server installed. This can be a new Ubuntu server instance with no additional configuration performed. However, you will need a version of Nginx built with HTTP/2 support (at least version 1.25.1), which may not be available by default in some environments. On Ubuntu, you can use this PPA to install a compatible Nginx.
- To enable HTTPS in the browser, you will need SSL certificates and your own domain name pointing to the server. You can create a standalone certificate using these instructions
Obtaining the Temporal Binaries
You'll begin by downloading and configuring the Temporal Server binaries.
The Temporal Core Server can be obtained from its Github Releases Page. The Temporal Core Server is responsible for orchestrating all tasks regarding the execution of Temporal Workflows, such as maintaining the Event History, maintaining Task Queues, responding to commands and more. Download the newest binary for your operating system (probably linux_amd64) and extract it on the command line using curl and tar:
curl -OL https://github.com/temporalio/temporal/releases/download/v1.24.2/temporal_1.24.2_linux_amd64.tar.gz
tar -xzf temporal_1.24.2_linux_amd64.tar.gz
The extracted binary will be called temporal-server. Move it to the /usr/bin/ directory on your path and make it executable:
sudo mv temporal-server /usr/bin/temporal-server
sudo chmod +x /usr/bin/temporal-server
You'll also need the Temporal UI server. The Temporal UI Server hooks in to a Temporal Core Server and provides a web-based UI for displaying information about Workflow Executions. It is a standalone binary that can also be obtained from its Github Releases page. Download the latest binary for your operating system and extract it on the command line using curl and tar:
curl -OL https://github.com/temporalio/ui-server/releases/download/v2.28.0/ui-server_2.28.0_linux_amd64.tar.gz
tar -xzf ui-server_2.28.0_linux_amd64.tar.gz
The extracted binary will be called ui-server. Move it to the /usr/bin directory on your path:
sudo mv ui-server /usr/bin/temporal-ui-server
sudo chmod +x /usr/bin/temporal-ui-server
At this point, you've downloaded everything you need. The last thing to do is create a temporal user on your server that has the appropriate permissions to run the Temporal Service, and a directory accessible to this user to store your data in. Run the following commands:
sudo useradd temporal
sudo mkdir /etc/temporal
sudo chown temporal /etc/temporal
Next, you'll create configuration files for both the Temporal Server and the UI Server in the /etc/temporal/ directory.
Configuring the Temporal Binaries
In this tutorial, you'll configure a connection to a SQLite database, since it doesn't require any additional dependencies. Using your favorite text editor, open a new file called /etc/temporal/temporal-server.yaml:
sudo vim /etc/temporal/temporal-server.yaml
Paste the following contents into the file for a starting configuration. You can update any of these values later.
log:
  stdout: true
  level: info

persistence:
  defaultStore: sqlite-default
  visibilityStore: sqlite-visibility
  numHistoryShards: 4
  datastores:
    sqlite-default:
      sql:
        pluginName: "sqlite"
        databaseName: "/etc/temporal/default.db"
        connectAddr: "localhost"
        connectProtocol: "tcp"
        connectAttributes:
          cache: "private"
          setup: true

    sqlite-visibility:
      sql:
        pluginName: "sqlite"
        databaseName: "/etc/temporal/visibility.db"
        connectAddr: "localhost"
        connectProtocol: "tcp"
        connectAttributes:
          cache: "private"
          setup: true

global:
  membership:
    maxJoinDuration: 30s
    broadcastAddress: "127.0.0.1"
  pprof:
    port: 7936

services:
  frontend:
    rpc:
      grpcPort: 7236
      membershipPort: 6933
      bindOnLocalHost: true
      httpPort: 7243

  matching:
    rpc:
      grpcPort: 7235
      membershipPort: 6935
      bindOnLocalHost: true

  history:
    rpc:
      grpcPort: 7234
      membershipPort: 6934
      bindOnLocalHost: true

  worker:
    rpc:
      membershipPort: 6939

clusterMetadata:
  enableGlobalNamespace: false
  failoverVersionIncrement: 10
  masterClusterName: "active"
  currentClusterName: "active"
  clusterInformation:
    active:
      enabled: true
      initialFailoverVersion: 1
      rpcName: "frontend"
      rpcAddress: "localhost:7236"
      httpAddress: "localhost:7243"

dcRedirectionPolicy:
  policy: "noop"
Save and close the file. Next, you'll create the configuration file for the UI Server. Using your favorite text editor, open a new file called /etc/temporal/temporal-ui-server.yaml:
sudo vim /etc/temporal/temporal-ui-server.yaml
Paste the following contents into the file.
temporalGrpcAddress: 127.0.0.1:7236
host: 127.0.0.1
port: 8233
enableUi: true
cors:
  allowOrigins:
    - http://localhost:8233
defaultNamespace: default
If you are using your own domain name, replace localhost in the allowOrigins property. Then save and close the file.
You can now run a Temporal Service on this server. However, you aren't ready to handle external connections yet -- at this point, your Temporal Service is only available on localhost, meaning it is not scalable or accessible outside the localhost network. In the remainder of this tutorial, you'll configure this server for production use.
Creating and Registering System Services
Because you installed Temporal directly from binaries, you need to run it manually from the command line. To run them automatically, you'll need to set up your own background services.
To do this, you’ll create unit files that can be used by your server’s init system. On nearly all modern Linux distributions, the init system is called systemd, and you can interact with it by using the systemctl command.
Using your favorite text editor, open a new file called /etc/systemd/system/temporal.service:
sudo vim /etc/systemd/system/temporal.service
Your unit file needs, at minimum, a [Unit] section, a [Service] section, and an [Install] section:
[Unit]
Description=Temporal Service
After=network.target

[Service]
User=temporal
Group=temporal
ExecStart=temporal-server -r / -c etc/temporal/ -e temporal-server start

[Install]
WantedBy=multi-user.target
This file can be broken down as follows:
- The
[Unit]section contains a plaintextDescriptionof your new service, as well as anAfterhook that specifies when it should be run at system startup, in this case, it will be run after your server’s networking interfaces have come up. - The
[Service]section specifies which command (ExecStart) should actually be run, as well as whichUserandGroupthe command should be running as. In this case, you will use thetemporaluser you created, and thetemporal-servercommand from the previous step. - The
[Install]section contains only theWantedBy=multi-user.targetline, which works together with theAfterline in the[Unit]section to ensure that the service is started when the server is ready to accept user logins.
Save and close the file. You can now start your new Temporal service, and enable it to run on boot automatically:
sudo systemctl start temporal
sudo systemctl enable temporal
Use the systemctl command to verify that temporal started successfully. You should receive similar output to when you first ran the command in a terminal.
sudo systemctl status temporal
● temporal.service - Temporal Service
     Loaded: loaded (/etc/systemd/system/temporal.service; disabled; vendo>
     Active: active (running) since Mon 2024-07-08 11:24:40 PDT; 4s ago
   Main PID: 19925 (temporal-server)
      Tasks: 22 (limit: 18707)
     Memory: 62.7M
     CGroup: /system.slice/temporal.service
             └─19925 temporal-server -r / -c etc/temporal/ -e temporal-server

Jul 08 11:24:42 Omelas temporal-server[19925]: {"level":"info","ts":"2024->
Jul 08 11:24:42 Omelas temporal-server[19925]: {"level":"info","ts":"2024->
Jul 08 11:24:42 Omelas temporal-server[19925]: {"level":"info","ts":"2024-
Next, repeat these steps for the UI server. Open a new file called /etc/systemd/system/temporal-ui.service:
sudo vim /etc/systemd/system/temporal-ui.service
Add the following contents:
[Unit]
Description=Temporal UI Server
After=network.target

[Service]
User=temporal
Group=temporal
ExecStart=temporal-ui-server -r / -c etc/temporal/ -e temporal-ui-server start

[Install]
WantedBy=multi-user.target
Save and close the file, then start the UI Server service, and enable it to run on boot automatically:
sudo systemctl start temporal-ui
sudo systemctl enable temporal-ui
Use the systemctl command to verify that temporal-ui started successfully:
sudo systemctl status temporal-ui
Both services should now be running in the background.
Deploying an Nginx Reverse Proxy with an SSL Certificate
To complete this step, you should have already obtained your own domain name and SSL certificates. One way to do that is by using certbot.
While your Temporal Service is currently running, it is still only available on the internal localhost network. Next you should make it available externally and secure connections to it.
When certbot retrieves certificates, by default, it stores them in /etc/letsencrypt/live/YOUR_DOMAIN. Check to make sure that you have them:
sudo ls /etc/letsencrypt/live/YOUR_DOMAIN
README cert.pem chain.pem fullchain.pem privkey.pem
Now, you can configure an Nginx reverse proxy to expose your Temporal Service to external connections. Putting a web server such as Nginx in front of other web-facing applications can improve performance and reduce the complexity of securing a site. Nginx can take care of restricting access and securely handling requests from your clients to Temporal. You'll configure the UI server first, which uses regular HTTP (web) traffic:
Nginx allows you to add per-site configurations to individual files in a subdirectory called sites-available/. Using your favorite text editor, create a new Nginx configuration at /etc/nginx/sites-available/temporal-ui:
sudo vim /etc/nginx/sites-available/temporal-ui
Paste the following into the new configuration file, being sure to replace YOUR_DOMAIN with your domain name.
server {
    listen 80 default_server;
    listen [::]:80 default_server;
    server_name YOUR_DOMAIN www.YOUR_DOMAIN

    access_log /var/log/nginx/temporal.access.log;
    error_log /var/log/nginx/temporal.error.log;

    location / {
        proxy_pass http://127.0.0.1:8233;
        proxy_http_version 1.1;
        proxy_read_timeout 300;
        proxy_set_header Upgrade $http_upgrade;
        proxy_set_header Connection "upgrade";
        proxy_set_header Host $http_host;
        proxy_set_header X-Real-IP $remote_addr;
        proxy_set_header X-Real-PORT $remote_port;
        allow YOUR_IP_ADDRESSES;
        deny all;
    }

    listen 443 ssl;
    # RSA certificate
    ssl_certificate /etc/letsencrypt/live/YOUR_DOMAIN/fullchain.pem;
    ssl_certificate_key /etc/letsencrypt/live/YOUR_DOMAIN/privkey.pem;

    # Redirect non-https traffic to https
    if ($scheme != "https") {
        return 301 https://$host$request_uri;
    }
}
You can read this configuration as having three main “blocks” to it. The first block, coming before the location / line, contains a boilerplate Nginx configuration for serving a website on the default HTTP port, 80. The location / block contains a configuration for proxying incoming connections to the Temporal Web UI, running on port 8233 internally, while preserving SSL. The configuration at the end of the file, after the location / block, loads your LetsEncrypt SSL keypairs and redirects HTTP connections to HTTPS.
Note the allow YOUR_IP_ADDRESSES; line. You should replace this with the IP address that you'll need to access the Temporal Web UI from. You can add additional addresses in the same range using CIDR notation, or add additional consecutive allow lines for multiple IPs. The deny all; on the following line will block traffic to all but the specified IPs. Because Temporal does not use any kind of authentication by default, restricting traffic by IP address is the least complex way of providing secure access.
Save and close the file. Next, you’ll need to activate this new configuration. Nginx’s convention is to create symbolic links (like shortcuts) from files in sites-available/ to another folder called sites-enabled/ as you decide to enable or disable them. Using full paths for clarity, make that link:
sudo ln -s /etc/nginx/sites-available/temporal-ui /etc/nginx/sites-enabled/temporal-ui
By default, Nginx includes another configuration file at /etc/nginx/sites-available/default, linked to /etc/nginx/sites-enabled/default, which also serves its default index page. You’ll need to disable that rule by removing it from /sites-enabled, because it conflicts with your new Temporal configuration:
sudo rm /etc/nginx/sites-enabled/default
Before reloading Nginx with this new configuration, you'll create another reverse proxy for gRPC API connections to Temporal itself. Create another Nginx configuration at /etc/nginx/sites-available/temporal:
sudo vim /etc/nginx/sites-available/temporal
Paste the following into the new configuration file, being sure to replace YOUR_DOMAIN with your domain name.
server {
    listen 7233 http2;
    listen [::]:7233 http2;
    server_name YOUR_DOMAIN

    http2 on;

    location / {
        grpc_pass localhost:7236;
        allow YOUR_CLIENT_IP_ADDRESS;
        deny all;
    }
}
This configuration is shorter than the previous one, because Nginx only needs to use the grpc_pass directive to send gRPC traffic to the server. Again, don't forget the the allow YOUR_CLIENT_IP_ADDRESS; line. In this case, you'll need an allow statement or IP range for everywhere that you plan to run your Temporal Workers, or any other Temporal Client, or connect via the temporal CLI.
Save and close the file, and create a symbolic link as before:
sudo ln -s /etc/nginx/sites-available/temporal /etc/nginx/sites-enabled/temporal
Now you can restart your Nginx service, so it will reflect your new configuration:
sudo systemctl restart nginx
Navigate to YOUR_DOMAIN in a web browser, and you should receive the Temporal Web UI. At this point, you're finished with configuration. In the final step, you'll review the logs generated by your Temporal Service, as well as your options for connecting to it from the Temporal CLI or SDK.
Interacting with the Temporal Service
In the last step, when you configured your Nginx reverse proxy, you enabled logging to /var/log/nginx/temporal.access.log; when you set the access_log parameter. Check this file if you ever need to review access logs to the Temporal Web UI.
You can also use journalctl to access logs from the Temporal Server itself. journalctl -u service-name.service allows you to view the full logs of any service running through systemd.
If you ever need to restart the Temporal Service after making a configuration change, use systemctl restart temporal or systemctl restart temporal-ui. If you need to reload your Nginx configuration after adding additional IP addresses to your allow list, use systemctl reload nginx to reload without potentially disrupting network traffic with a restart.
Finally, you should now be able to interact with your Temporal Service as if it were running locally. Just include --address your_server:7233 with your CLI commands as needed. The first thing you'll likely need to do is create a default namespace, since this is not done automatically:
temporal --address your_server:7233 operator namespace create default
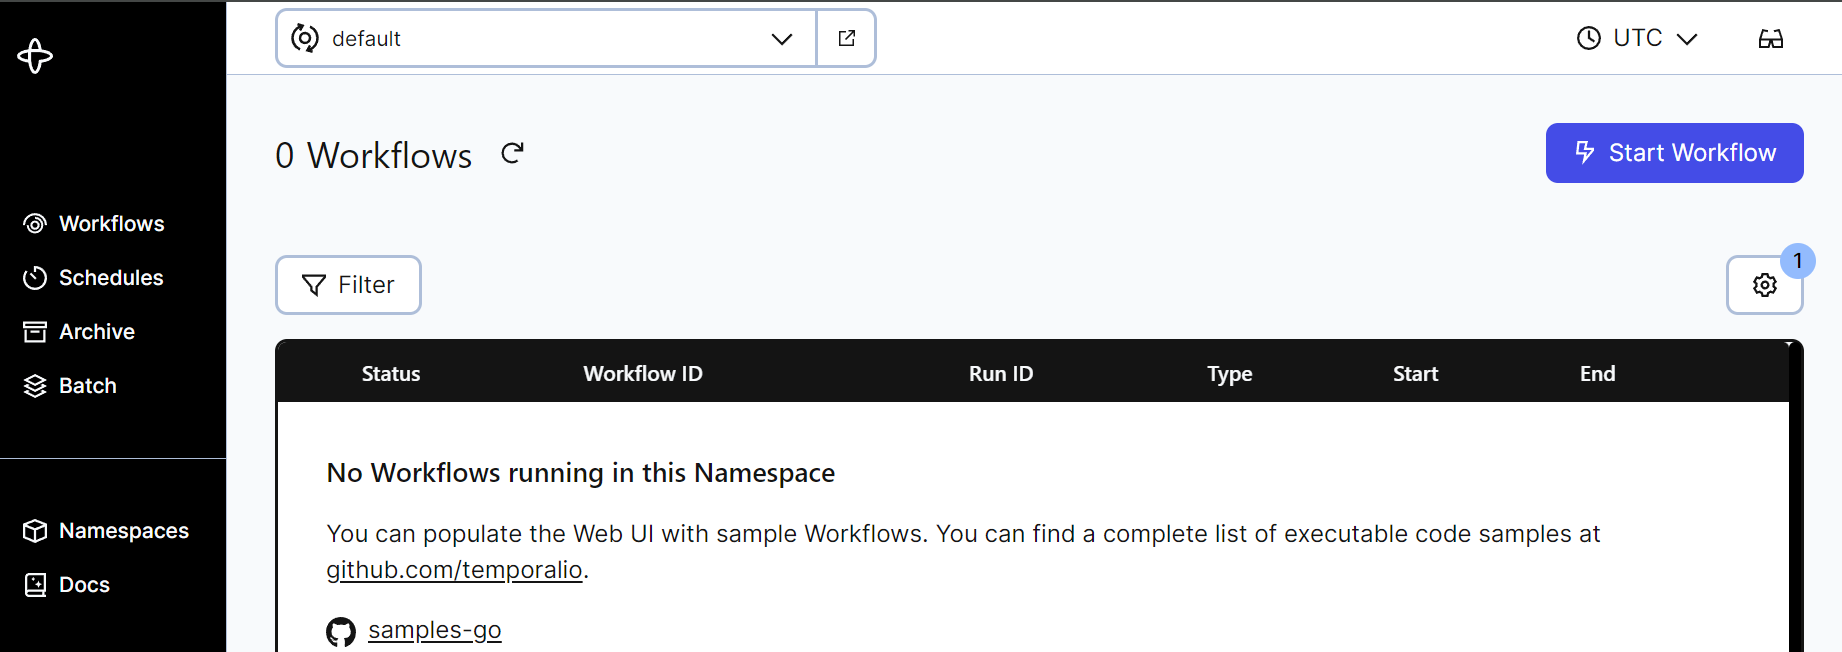
After that, you can visit the Web UI to ensure that it loads the default namespace correctly by visting your_server in a browser:
From then on, you can run commands like so:
temporal --address your_server:7233 workflow list
Refer to the Temporal documentation for more.
Conclusion
In this tutorial, you configured and deployed a baseline Temporal Service. Next, you can read about Temporal's Visiblity features which require adding ElasticSearch to your deployment. You can also learn more about the Temporal platform by following our self-paced online courses, or talk to an expert about Temporal Cloud.