Run Workers with Temporal Cloud for the TypeScript SDK
Temporal Cloud oversees the execution process by preserving the source of truth for your Workflow Execution Event Histories. This independent supervision ensures the durable execution of your distributed applications and services.
In Run your first Temporal application with the TypeScript SDK, you started a Worker and ran a Workflow with a local instance of the Temporal Service.
While this setup is suitable for local development and testing, it may not be ideal for production workloads that require scalability and high availability.
In this tutorial, you will migrate your application from a local Temporal Server to a managed Temporal Cloud environment, generate certificates, update your Worker code, and run your Workflow.
Prerequisites
Before getting started, review the following prerequisites:
- Get access to a Temporal Cloud account.
- Complete the Run your first Temporal application with the TypeScript SDK tutorial.
- Provide a method to generate certificates for your Namespace.
Generate certificates
Certificates are crucial for securing access and communication with Temporal Cloud. They are required for configuring mutual Transport Layer Security (mTLS) protocol, which is used to secure Temporal Cloud access.
You have a few options to generate certificates.
- Use existing certificate management infrastructure to generate certificates for your Namespace.
- Use Temporal's built-in certificate generation tool tcld.
- Use open-source tools like certstrap.
The next step uses certstrap to generate certificates.
Create a Certificate Authority (CA)
Create a new Certificate Authority (CA) using Certstrap:
./certstrap init --common-name "Cert"
This command creates a self-signed CA certificate named Cert.crt in the out folder within the Certstrap directory.
This CA certificate will be used to sign and issue end-entity certificates.
Set the Namespace Name
Set the Namespace Name as the common name for the end-entity certificate:
- macOs
- Windows
For Linux or macOS:
export NAMESPACE_NAME=your-namespace
For Windows:
set NAMESPACE_NAME=your-namespace
Replace your-namespace with the name of your Temporal Cloud namespace.
Request an End-Entity Certificate
Next, request a certificate with a common name equal to the Namespace Name:
./certstrap request-cert --common-name ${NAMESPACE_NAME}
This command creates a Certificate Signing Request (CSR) for an end-entity certificate, but not the actual certificate itself.
Sign the Certificate Request
Sign the certificate request and generate the end-entity certificate:
./certstrap sign ${NAMESPACE_NAME} --CA "Cert"
This command takes the CSR from the previous step and signs it with your CA (Cert).
The result is an end-entity certificate (your-namespace.crt) that is now a valid certificate signed by your CA.
Use the Certificates with Temporal Cloud
You can now use the generated client certificate (your-namespace.crt) and the CA certificate (Cert.crt) with Temporal Cloud.
You will upload the contents of the Cert.crt file to the CA Certificates section of your Namespace settings.
- Sign in to your Cloud account.
- On the left-hand navigation menu, select Namespaces.
- Select your Namespace and then choose Edit.
- Paste your CA Certificate into the CA Certificates section.
- Select Save to continue.
Make note of the Namespace you uploaded your CA certificate to. You will need it when connecting your Worker to your Namespace and when starting your Workflow.
Now that you have generated your CA certificate and uploaded to your Temporal Namespace, you can update your Worker code.
Update Worker code to connect to Temporal Cloud
You will build off the code used in the Run your first Temporal application with the TypeScript SDK tutorial.
When working with Temporal Cloud, you will provide an encrypted connection using Mutual Transport Layer Security (mTLS) to secure the communication between your application and the Temporal Cloud service.
Open the worker.ts file and update your import statements.
Import the NativeConnection class. This is used to configure settings used when connecting to Temporal Cloud.
- TypeScript
- JavaScript
import { Worker, NativeConnection } from "@temporalio/worker";
// Not required in JavaScript
Temporal supports mTLS as a way of encrypting network traffic between the services of a cluster and also between application processes and a Cluster. For more information, see Security model in Temporal Cloud.
Next, you will make use of the built-in fs/promises module.
To read the TLS certificate and key files, use the fs/promises module.
Add the following import statement at the top of your file:
- TypeScript
- JavaScript
import fs from "fs/promises";
// Not required in JavaScript
Next, update the configuration used to make a connection with the Worker.
Add the NativeConnection and pass in the TLS configuration:
- TypeScript
- JavaScript
const connection = await NativeConnection.connect({
    address: process.env.TEMPORAL_ADDRESS!,
    tls: {
      clientCertPair: {
        crt: await fs.readFile(process.env.TEMPORAL_MTLS_TLS_CERT!),
        key: await fs.readFile(process.env.TEMPORAL_MTLS_TLS_KEY!),
      },
    },
  });
const connection = await NativeConnection.connect({
  address: process.env.TEMPORAL_ADDRESS,
  tls: {
    clientCertPair: {
      crt: await fs.readFile(process.env.TEMPORAL_MTLS_TLS_CERT),
      key: await fs.readFile(process.env.TEMPORAL_MTLS_TLS_KEY),
    },
  },
});
This code reads the TLS certificate and key files using the fs/promises module and uses them to configure the NativeConnection object.
Next, update the Worker configuration to read the Namespace from the shared file.
Open shared.ts and add the following:
- TypeScript
- JavaScript
export const namespace: string = process.env.TEMPORAL_NAMESPACE;
export const namespace = process.env.TEMPORAL_NAMESPACE;
This retrieves the Namespace from environment variable and passes it to the Worker.create() method.
Next, you will set the required environment variables.
Set the required environment variables
Before running your application, set the following environment variables with the appropriate values provided by your managed Temporal Cloud environment:
TEMPORAL_MTLS_TLS_CERT: The path to the.pemfile with your mTLS x509 Certificate.TEMPORAL_MTLS_TLS_KEY: The path to the file with your mTLS private key.TEMPORAL_HOST_URL: The host URL of your managed Temporal Cloud environment.TEMPORAL_NAMESPACE: The Namespace Name and Account Id associated with your Temporal Cloud environment.
- MacOS
- Windows
export TEMPORAL_MTLS_TLS_CERT=/path/to/tls/cert.pem
export TEMPORAL_MTLS_TLS_KEY=/path/to/tls/key.pem
export TEMPORAL_HOST_URL=https://namespace.account-id.tmprl.cloud:port
export TEMPORAL_NAMESPACE=namespace.account-id
set TEMPORAL_MTLS_TLS_CERT=C:\path\to\tls\cert.pem
set TEMPORAL_MTLS_TLS_KEY=C:\path\to\tls\key.pem
set TEMPORAL_HOST_URL=https://namespace.account-id.tmprl.cloud:port
set TEMPORAL_NAMESPACE=namespace.account-id
Replace namespace, account-id, and port (the default port is 7233) with the appropriate values for your Temporal Cloud environment.
What is a Temporal Namespace?
The TEMPORAL_NAMESPACE is the Cloud Namespace Name Id and is constructed by concatenating your specified Namespace name, a dot (.), and your Account Id.
This format, Namespace name.Account Id, serves as a globally unique identifier for a Namespace within the Temporal Cloud service.
The Namespace name (user-defined) on the left, combined with the Account Id (system-assigned) on the right, forms the complete Cloud Namespace ID.
The following is an example of a Cloud Namespace Name Id, where docs-assembly is the Namespace name and a2dd6 is the Account Id.
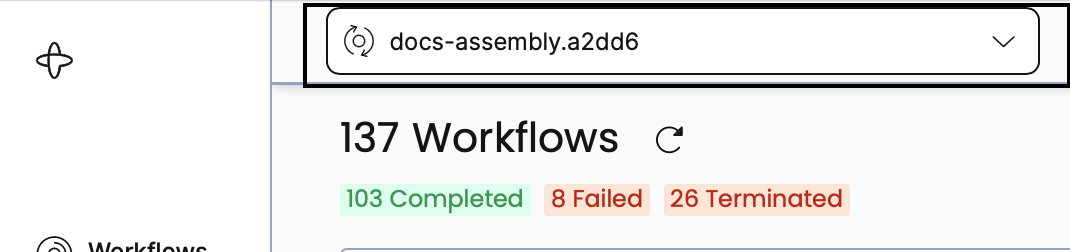
The Cloud Namespace Name Id is crucial for deriving the gRPC endpoint needed when configuring a Client to access Temporal Cloud.
Run your application connected to Temporal Cloud
After completing these steps, your application is ready to connect to Temporal Cloud.
- Run the
temporal workflow startcommand.
temporal workflow start \
 --task-queue money-transfer \
 --type MoneyTransfer \
 --tls-cert-path ${TEMPORAL_MTLS_TLS_CERT} \
 --tls-key-path ${TEMPORAL_MTLS_TLS_KEY} \
 --namespace ${TEMPORAL_NAMESPACE} \
 --address ${TEMPORAL_HOST_URL}
Ensure that the certificate path, private key path, Namespace, and address argument values match your project.
- Sign in to your Cloud account.
- Visit the Workflow page of your Cloud Namespace. The URL will look something like the following:
https://cloud.temporal.io/namespaces/<namespace>.<account-id>/workflows
You will see the last run of your Workflow matches the command you ran.
Conclusion
Migrating your application from a local Temporal Server to a managed Temporal Cloud environment requires setting up your certificates, creating a connection, and running your code.
By leveraging Temporal Cloud, you can focus on developing and deploying your application without the overhead of managing the underlying infrastructure. Temporal Cloud provides a scalable and reliable platform for running your Workflows and Activities, ensuring the durability and resilience of your application.
By running your application in Temporal Cloud, you can benefit from a robust and efficient environment that supports the execution of your distributed applications and services.